Showing posts with label home decor. Show all posts

Monday, October 20, 2014

home inspiration - for the future

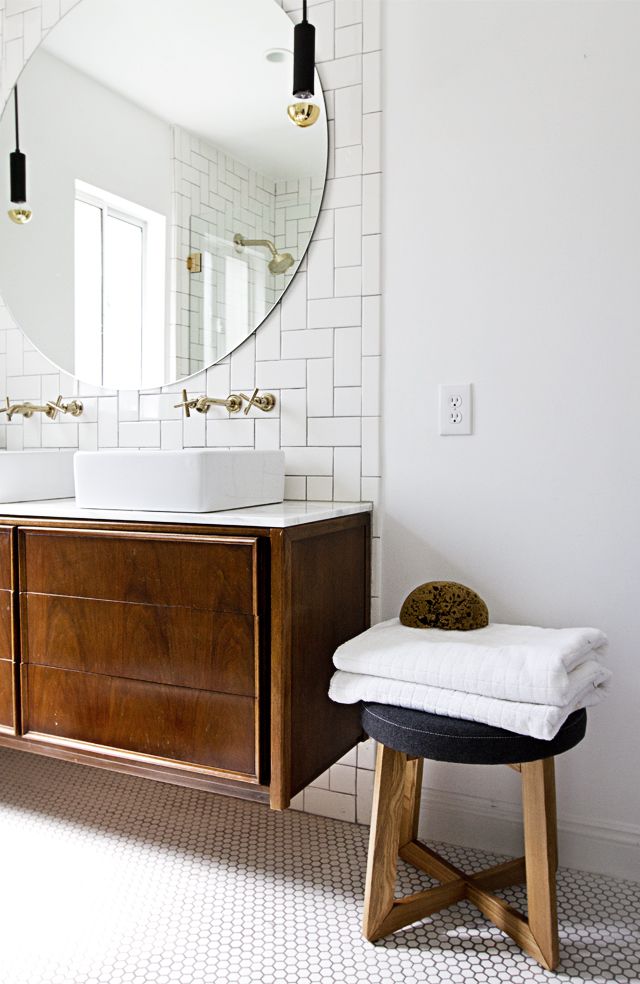
Recently, my husband got a huge promotion at work.  For normal people, this would mean they would be able to afford to move out of their parents' basement!  But unfortunately for us, we now have student loans that are coming out of deferment and we will have to make payments on those that will be large enough to keep us in the basement for an unforeseeable amount of time longer.  In the meantime, I like to daydream about what I could or would do if we had a place of our own.  Here are some spaces that I love and will keep for inspiration for the day when we get to become *real* grown ups. *click images for sources*

http://www.domainehome.com/moving-in-together/slide3

http://dustjacket-attic.com/2014/03/interior-design-a-new-york-townhouse.html/

http://helenpe.choicestockholm.com/sets/dv/33807

www.pinterest.com/pin/163818505171077188/

http://www.smittenstudioonline.com/an-ode-to-the-ottoman/

You can follow along with all things home that I'm loving right here

Maybe I should tell the story of our situation?  It's long and would need to be broken up over a few posts.  For now, let's just say it involves life giving us the biggest lemons we've ever had and how we've had to learn to accept it and move on.

Thursday, October 16, 2014

throw pillow with embroidery wrapped piping

The inspiration for this project came from this simple, but gorgeous pillow at Anthropologie.

http://www.anthropologie.com/anthro/product/home-room/33613936.jsp#/

I thought about doing a metallic thread, but after seeing this pillow tutorial, I thought it would be fun to use a bright color instead.  It definitely would be out of the ordinary for me and it's good to step outside of the box sometimes.


I made this pillow with an envelope closure; you can see my tutorial for that here.  I was going to buy white piping, but my daughter was with me and she picked out lime green.  Also, they were out of white, so we went ahead and used the lime green.  The embroidery floss I used is DMC color 891, found at my local craft store.


Make the pillow following the instructions on the tutorial.  To wrap the piping, knot the end of the embroidery floss and and start from the inside.  Bring your needle out at the base of the piping and stitch around the piping, wrapping the floss around it to cover it.  You can use a satin stitch to make it smooth and perfect, but I like the way it looks with some of the floss overlapping itself a few times and then other spots being a little more smooth.  When you run out of floss, bring the needle back inside and knot it.  Keeping all of your knots inside the pillow will keep the outside looking neat and clean.  To finish this, I needed about 4 1/2 skeins.  While this is a really simple project, it is time consuming.  It took a few weeks to get it done, not because it took that long, but because I don't have large chunks of free time.  It's a great activity to do while watching a show, which is exactly what I did any time my husband and I watched something.


It's a fun way to get the exact color piping you want with a fun texture.  If you tackle this project, I would love to see them.  Link it up in the comments!

Friday, May 16, 2014

DIY - Pom-trimmed Duvet Cover

For months, maybe even longer, I've been searching for a duvet cover for my daughter's bed that isn't too frilly or to babyish, one that she could grow up with, at least through elementary school maybe, and that proved to be impossible.  I didn't want to spend an arm and a leg on one and all the ones that I liked were way out of my price range.  So I decided that the only reasonable alternative was to make one.  But first, I had to figure out how I wanted it to look, which took way too long.  I finally decided that I wanted it to be solid white, but to have a little something extra so it wasn't just plain, because obviously I could just buy a solid white duvet for like $20.  Then it occurred to me: pompom trim!  Why is it that pretty much anything miniature is by default adorable?  Pompom trim is probably my most favorite thing in the sewing world ever, it's so darn cute!  At first I thought about doing yellow, but then I was worried that doing so would narrow down any decor I could do in her room, so I changed my mind on that and decided to do black instead.  And seriously, white and black is such a great and classic combo, how could you go wrong?  Well, you can't because it turned out freakin' awesome.


To make this duvet cover, I used two of these $4 flat sheets from Ikea and 6.75 yards of pompom trim; I bought mine at Joann's with a 55% off coupon, so it was really cheap.  Just an FYI, the sheets aren't terribly soft, but after washing them they did soften up quite a bit and that was without fabric softener.  I'm sure if you use some, they'll be even softer.  I figured for a duvet cover, this wasn't a problem at all because they're still soft, they're not itchy, and my daughter will have a sheet between her and the duvet anyway.  Now the sheet measures 98" L x 66" W and I had this Ikea comforter already, which measures 86" L x 64" W, so I decided to leave the width of the sheets as they came and to cut the length down 10 inches, so to 88", giving me one inch on all sides to work with.

To start, I laid one of the sheets down, face-side up, and pinned the pom trim to the edge with the balls facing inward, that way when it was turned right-side out, they would be on the outside too (sorry, no pictures of this part!).  I sewed the pom trim down first so that it would be easier to sew the second sheet on top.

Before attaching the second sheet, I cut 4 strips of fabric from remnant parts of the sheets that measured 18 inches long each.  I just cut right along the original hem so that they were all thick and already sewn together; again no pictures, I apologize.  I then folded them in half and attached them to the corners of the duvet on the sides, top and bottom, about 2 inches in.


I sewed over them twice and then they got a third stitch when I sewed on the second sheet, so they're nice and secure and ready to hold the comforter in place.


After the pom trim was attached, I laid the second sheet on top, face down, and sewed along the sides and the top.  At the bottom, where you put the comforter inside, I stitched across six inches from both ends. 


For the last step, I attached 4 pieces of Velcro, each 3 inches long, that were evenly spaced along the bottom.  Make sure that you fold the pom trim under so that it's lined up with the sides.


Now you're done!  Put your comforter inside to make sure it fits right and you're ready to use your brand new, totally custom and very inexpensive duvet cover.


And yes, I photographed it on our bed because currently, our daughter sleeps on a mattress on the floor.  Oh the trouble with living with your in-laws.  But whatever, it's good for her; builds character.

So, do any of you struggle like I do with finding duvet covers or am I just insanely picky?

Monday, April 21, 2014

DIY Tufted Headboard - It's Finished!

My husband has been so incredibly supportive and nice enough to help me with this project and together we cranked out our headboard over the weekend.  It's finally done!  And now I kind of feel like...what am I supposed to do now?  Except not really because I have a list of projects, but it really feels weird (in a great way!) to have this done.  I've been wanting to make one for years now and then we finally started it and now it's done.  Crazy!


In my last post, we left off with the legs just being finished and needing to be attached.  To start, I found some screws that were long enough to go all the way through the legs and about 3/4 of the way through the plywood.  Then I found a drill bit that was small enough to create the right size whole for the screws.  The way my father-in-law taught me to do this is to hold up the screw and the drill bit behind it.  If the center of the screw, not the grooves, just barely hides the drill bit, then the drill bit is the right size.  When I calculated the measurements for my legs, I made it so the legs would go up ten inches on the plywood.  I measured ten inches and marked it with a sharpie on both sides, then I triple checked to make sure they were in the same spot.  I then marked a line at 2 and 8 inches from the top of the legs so I knew where to drill my holes.  After the holes were drilled, I clamped the legs down in place and then used the drill to place the screws.  I used four on each leg.

On this leg, the top of the screw broke off, leaving the rest of it still inside the leg, but the leg was secured tightly, so I didn't bother trying to fix it.

After the legs were attached, it was time to add the foam.  Upholstery foam is really pricey, so I decided to use a mattress foam topper instead.  I found these on sale and I decided to get three of them because I wanted the headboard to be really thick and soft.  The foam measured 75" x 54" and our headboard is 80" x 42", so there was plenty of foam, but it needed to be cut to fit.  I did that by laying it down on top of the plywood and lining up the bottom and left side.  Then I cut off the extra at the top and laid it down on the other side to fill in that gap and cut off the extra at the bottom.  To attach the foam, I used this spray adhesive to help it stay in place better, which didn't actually work all that well, but I think I could have used a lot more than I did.  I was just concerned about running out, silly me!


I used the spray adhesive for each layer.  I also switched sides with the smaller piece to avoid the chance of it creating this weird gap after it was all put together.  So I started with the small piece on the right, then on the second layer it was on the left, and then back on the right for the top layer.


After the foam was on, I covered it with quilt batting that measured 90" x 108".  It comes folded in half the short way (so 45" x 108", with two layers), and I decided to just lay it on top of the foam with it folded in half.  The extra layer of batting would just add extra softness.  Pull the batting around and staple it in place.


Make sure it's secured down well without ripping it.  The batting will help to hold the foam in place while your headboard is upright.


After the batting is secured, it's time to start tufting.  I bought 4 yards for this project, but the lady gave me 4 1/2 because it had been cut weird previously.  It was nice to have that extra fabric because we were able to cover the back of the headboard as well.  We started by draping the fabric over the headboard and we made sure that it was straight and in the right place so that we had enough on the top and bottom to staple it down.  The fabric is only 54" wide and the headboard is 42" plus the 15/32" inch thick plywood, 4 1/2" thick foam, and the layer of batting, so we had to be sure we had enough to pull over and back on the top and bottom.

When you start tufting, start on the top row and in the middle.  It'll be much easier to make sure the fabric is gathering in the right places this way.


For the tufting we used a 12" upholstery needle and waxed cording.  The waxed cording was really great because it didn't slip and slide around, which made pulling the buttons tight really easy.  We cut the waxed cording to 12" long and used two strands for each button.  To tuft, we first pushed the needle through the back out to the front so that we could see where the button was going to be.  After making sure it was in the right spot, we pulled the needle all the way through, which left a hole in the fabric so that we could see where to put the needle through again.  Then, we tied the wax cording tight around the back of the button, threaded the needle and pushed it through the hole and out the back.


Once the needle was out the back, my husband would pull the cording all the way out and then I would push the button as deep into the foam as I wanted it to go.  While I held the button in place, my husband then stapled it down, in a zigzag to hold it extra tight, and then he hammered down the nails so everything was secured.


We worked our way out left and right and finished the top row.


At first, things were moving really slowly as we figured out the whole process and started to get the hang of it, but after about the second row, we started to move a lot faster.


While you're tufting, you'll want to make sure to help guide the fabric into a diamond fold, but the fabric will do most of that on it's own.


After you're done with the tufting, it's time to pull the fabric around and staple it in the back.  Make sure that as you do that, you pay attention to where the fabric falls on the button lines because it needs to be gathered and folded so that it looks clean and not bunchy along the edges.  Since we had attached wooden pieces on the back to straighten out the plywood, we decided to use the extra foam we had to cover it up so it won't scratch walls.  We just covered them with the foam and stapled them in place.  Then we used the leftover fabric we had and covered the back with it, stapling it in place.


And now our headboard is complete!


Because it's so tall, it leans a little bit, so we'll need to attach it the wall.  We can't right now because we live with my in-laws and our bed is up against the Murphy bed they installed in our room.  So for now, it leans a little bit, but it still looks great.  I'm so happy with how it turned out!  So what do you guys think?  Is this a project you think you'd like to tackle too?

And in case you're interested, our duvet and shams are West Elm that we got for 50% off in store, the gold diamond pillows are from fabric I designed and I made them using my tutorial, and the navy blue pillow I got at Target on clearance for way cheap, but for some reason online it's full price.

Wednesday, April 16, 2014

DIY Upholstered Headboard - The Wood Elements

This process of making our own headboard has a lot of steps, so I thought that I would break it up into posts based on the different parts rather than trying to cram it all into one really long post.  You can read about the planning stage, see my inspiration photos and get all my measurements for the tufting here, and you can learn how to make your own fabric buttons here.


Since we didn't want our headboard to have to be mounted on the wall, we couldn't use pegboard for the back because it's too flimsy.  We opted for plywood instead and really, the measuring and drilling of the holes for the tufting wasn't that bad at all.

We bought the plywood at Home Depot (this one) and had them cut it down for us to 80"x42".  I've read on other blogs that normally home improvement stores will charge you a couple dollars to cut the wood, but we weren't charged and it was so nice to have the wood cut their for us with their big saw rather than trying to do it at home.  It just seems like it would have been a lot harder than necessary.


The kids sure loved going for a ride too!


To start out, I marked on the headboard where all the rows of holes will be, going across the top and left sides, following my measurements here.  Then I used my measuring tape to find where all the holes needed to be drilled and marked them with a sharpie.  After I had marked the holes, I used a leveler to go over each one and make sure they were all straight and even and lined up exactly where they needed to be.  This part took some time.  I ended up having to go over them twice to be sure that I had them in the right spot.


If you look closely, you can see some silver dots over black dots.  I originally marked where the holes would be with a black sharpie, and then when I double checked them with the leveler, I marked over the black dots with a metallic silver sharpie so that I knew exactly where I needed to drill.  To drill the holes, I used a 3/8" bit so the holes would be plenty big enough for my upholstery needle.

The next thing I did was sand down the plywood.  I didn't want to worry about getting any splinters while working with it, so I sanded it down just enough so that it was smooth; not nice-wood-finish smooth, but smooth enough.  After it was sanded, I dusted it off and coated it with two coats of polyurethane on both sides and all the edges.  Utah has a really dry climate, but if we ever move somewhere that's humid, I want to be sure that the wood won't warp.  So I made sure to coat it well and to get the poly down inside the holes also.  I used this type of polyurethane in satin finish and I used just under a quart for this entire project.


The plywood was bowed pretty badly, so my husband suggested we attach long pieces of wood to the side where it curved down so that they would pull the plywood up and straighten it out.


We centered the four pieces of wood between the rows of holes.  This will be the backside of the headboard so that they don't interfere with the look of the foam padding or the whole tufting process.  To attach the wood pieces to the plywood, my husband drilled screws all the way through.  Some of them went through and stuck out on the other side.  We were going to sand them down, but we couldn't find my father-in-law's metal sander, so my husband took a hammer and broke the ends off.  I went back and gave them a single coat of polyurethane for good measure.


To make the legs, we started out with a board of oak and cut it into two pieces that measured 32.5" long.  Then my husband sent them through the planer to make sure they were even and to cut them down to 3/4" thick.  After that was done, he then cut each board into 3" wide strips so that we had four wood beams that measured 32.5"x3"x3/4".  Then we glued them together so that we had two legs that were 1.5" thick.


We used this wood glue on both sides being glued together so it would hold well.  We spread the glue around with our fingers making sure to cover all the way to the ends.  Then we put the pieces together and clamped them down to hold it in place.


Then my husband used another clamp to hold it on the edges so that the pieces were lined up straight.


And then he did it again on the long ends.


We left the clamps on for about an hour while the glue dried enough so that they would hold well.  The glue seeped out onto the sides, so he took a scraper and scraped all of that off.  After allowing the glue to dry overnight, I sanded down the legs, making sure to get along the edges too because they were pretty sharp and I wanted the legs to have a nice, smooth finish all around.


I used 80 grit sand paper first to smooth it down and then 150 grit to finish it off.  I didn't go any finer than that because this wood isn't going to be used for flooring or anything that will get a lot of body contact.  After they were sanded down, I cleaned them off and stained them with Minwax Early American.  I wanted the legs of our headboard to match the legs on our Ikea hack nightstands.  Just like with the nightstands, I only applied one coat because it was dark enough; any more than that and it would have been too dark.


After the stain dried, I applied two coats of the same polyurethane I used on the plywood.  And that's where we're at now.  We still need to attach the legs to the plywood and then get going on the upholstering and tufting.  Hopefully we'll have it completed in the next week or so!

Friday, March 7, 2014

How to Make Fabric Buttons

So I've been working, slowly, on our headboard and I just finished our buttons, which actually took longer than I thought they would, but they were still pretty easy.  However, I had never made these before and getting started was kind of tricky since the instructions on the back of the button pack are pretty vague.  I had to look up instructions on how to do this and a friend of mine told me she wanted me to show her how to do it too when I was done, so I thought maybe there are others out there who have wanted to make these fabric buttons but don't know how, so they haven't.


Supplies:
button kit - I used this one
button refill kit (unless you only need 4) - I used this one
fabric
scissors
hammer

On the back of the button kit, there is a stencil in the shape of a half circle that you need to cut out.


Lay your stencil down on the back of your fabric and trace around it.  Then flip it over and trace around it again to finish the circle.


Cut out your circle and place your button shell on top, making sure to center it.


Next, you need to put the fabric and your button shell inside of the mold, making sure that the button shell stays centered on the fabric.  Squeeze the mold so that it comes all the around the top of the button shell.


The stencil makes a circle that is too large to fit with the button back on it, so you'll need to trim around the edge of it.  Make sure not to cut more than 1/8 of an inch off because you need to have enough fabric for it to reach around the sides of the button shell and then hold underneath the button back.  Now having only done this with upholstery fabric, I don't know if you would actually need to trim if you were using a thin cotton fabric, so you can try it and if it works, great, but if not, just trim a little bit off.

Now you're ready to put the back on.  Push all of the fabric down into the center of the button shell and set the button back on top with the metal loop facing out, keeping it as centered as possible.


Then place the pusher on top of the button back inside the groove right along the edge.


To push the button back into the shell, you can do this by pressing down with your hand while the mold sits on top of a sturdy surface.  But, with the thickness of the upholstery fabric, it was impossible to do this without killing the palm of my hand.  So, I used a hammer instead.  With a fair amount of force, hammer the top of the pusher, making sure to hit it on the center.  You might need to hammer it a couple of times to make sure it goes down all the way.  Now you can peal back the sides of the mold and pull out your button.


Having the buttons all done is really exciting.  Now it's time to work on the actual structure of our headboard.  This is easily the most exciting project I've ever done for us so far!