Showing posts with label decor. Show all posts

Monday, October 20, 2014

home inspiration - for the future

Recently, my husband got a huge promotion at work.  For normal people, this would mean they would be able to afford to move out of their parents' basement!  But unfortunately for us, we now have student loans that are coming out of deferment and we will have to make payments on those that will be large enough to keep us in the basement for an unforeseeable amount of time longer.  In the meantime, I like to daydream about what I could or would do if we had a place of our own.  Here are some spaces that I love and will keep for inspiration for the day when we get to become *real* grown ups. *click images for sources*

http://www.domainehome.com/moving-in-together/slide3

http://dustjacket-attic.com/2014/03/interior-design-a-new-york-townhouse.html/

http://helenpe.choicestockholm.com/sets/dv/33807

www.pinterest.com/pin/163818505171077188/

http://www.smittenstudioonline.com/an-ode-to-the-ottoman/

You can follow along with all things home that I'm loving right here

Maybe I should tell the story of our situation?  It's long and would need to be broken up over a few posts.  For now, let's just say it involves life giving us the biggest lemons we've ever had and how we've had to learn to accept it and move on.

Thursday, October 16, 2014

throw pillow with embroidery wrapped piping

The inspiration for this project came from this simple, but gorgeous pillow at Anthropologie.

http://www.anthropologie.com/anthro/product/home-room/33613936.jsp#/

I thought about doing a metallic thread, but after seeing this pillow tutorial, I thought it would be fun to use a bright color instead.  It definitely would be out of the ordinary for me and it's good to step outside of the box sometimes.


I made this pillow with an envelope closure; you can see my tutorial for that here.  I was going to buy white piping, but my daughter was with me and she picked out lime green.  Also, they were out of white, so we went ahead and used the lime green.  The embroidery floss I used is DMC color 891, found at my local craft store.


Make the pillow following the instructions on the tutorial.  To wrap the piping, knot the end of the embroidery floss and and start from the inside.  Bring your needle out at the base of the piping and stitch around the piping, wrapping the floss around it to cover it.  You can use a satin stitch to make it smooth and perfect, but I like the way it looks with some of the floss overlapping itself a few times and then other spots being a little more smooth.  When you run out of floss, bring the needle back inside and knot it.  Keeping all of your knots inside the pillow will keep the outside looking neat and clean.  To finish this, I needed about 4 1/2 skeins.  While this is a really simple project, it is time consuming.  It took a few weeks to get it done, not because it took that long, but because I don't have large chunks of free time.  It's a great activity to do while watching a show, which is exactly what I did any time my husband and I watched something.


It's a fun way to get the exact color piping you want with a fun texture.  If you tackle this project, I would love to see them.  Link it up in the comments!

Wednesday, May 28, 2014

Design Inspired - Emerald

For my second design inspired challenge, I decided to do it on the color emerald.  Green isn't my favorite my color, although it used to be.  When I was in 7th grade, I painted my bedroom a nice shade of sage green.  I also had dark green bedding to go right along with it; I was already working the monochromatic look!  It's been a long time since I've been that fond of the color, in fact most of the time I just try to avoid it because it just isn't my thing much anymore.  That being said, I figured it was the perfect color to work with this time around.  Maybe next time I'll do something like pink or orange, also colors I'm not the fondest of.

Anyway, I'm getting off track here.  Actually, my inspiration for this challenge was the Emerald City from the Wizard of Oz.  I love that movie and my sisters and I watched it a lot growing up.

http://ppc.wikia.com/wiki/The_Wizard_of_Oz

I haven't see the movie in at least a decade, but I remember two important things about the Emerald City.  1: it was very green, obviously, and 2: the way it was designed and the way the people dressed was weird, yet high class and elegant.  So that's what I wanted to focus on in this design board, just more elegant, less weird.

sources // pink chair / b+w pillow / gold side table / vase + flowers / coffee table / rug / sofa / floral pillows / gold studded pillow / chaise lounger / emerald pillow / gold curtains / gold art / floral art / mirror / chandelier / paint / paintable wallpaper

Since the Emerald City was my inspiration, I wanted the color emerald to be the main focus.  I wanted the room to feel elegant as well, so I brought in gold and velvet and even the marble on the coffee table added to that as well.  I was concerned that the room might feel cold or unapproachable, so I added some playful elements with the pink velvet chair and the Dalmatian spotted rug.  You know, I'm not an animal print fan at all, but I am really loving that Dalmatian print.  It's such a fun spin on polka dots.

Rather than just painting the walls solid green, I thought a nice touch would be to use the paintable wallpaper so that you get the emerald green but are also including a beautiful pattern and texture.

At first I was going to use a gold floor lamp like this or this, but then it occurred to me that if I want the room to feel elegant, a floor lamp wasn't the best idea and that I needed to do a chandelier instead.  I had a hard time deciding between the one pictured and this one.  I love them both and I think either would look great in this space, but when I put them in I decided that the Zanadoo was the winner.  It's more modern and fits my style better, so really in this case it was all about personal preference.  What I think made this the deal breaker was that it was different enough from the other gold elements.  The Leona Chandelier is fairly similar in design to the coffee table and I wanted each piece to not only fit into the room but to also stand out on their own.

So would you consider making a bold color like emerald the main design focus of your space?  I was genuinely surprised by how much I loved the way this turned out and I think I might do this again but for an office. 

Friday, May 23, 2014

Design Inspired - Peacock

Have you ever watched HGTV's Design Star?  I've only recently watched season 5 because, hello, Emily Henderson won and she's my design icon.  Anyway, in the challenges, the designers are given something to use as their inspiration, but they're not supposed to use the actual thing in their space, although there are some challenges where that is part of the challenge and it just makes it even more difficult.  Anyway, as a way to challenge myself some more, I decided to start doing this for myself.  For my first one, I chose to use the peacock as my inspiration.

http://emhasantosa.wordpress.com/2012/08/05/a-peacock-and-a-beautiful-golden-swan/

I love the vibrant colors, but it was challenging to come up with a space where they could commingle in harmony.  This was good for me though because I need it to be a challenge, otherwise I won't learn anything.  I normally gravitate towards large neutral pieces with small pops of color, but this time I wanted to change that up a little.


sources // wallpaper / sofa / gold pillow / blue pillow / credenza / lamp / rug / coffee table / side table / chair / mirror / ampersand art / love art / oyster art

Big and bold wallpaper like that Lear Gaukur from Anthropologie, while gorgeous, is not something I would normally use in a large space, but I think in this setting it would look beautiful on one wall as an accent or even all the walls.  Even though the birds aren't peacocks, I love that it still incorporates birds and bright colors.  The greens and blues in it fit in perfect with the peacock theme.

The Chester tufted sofa is from West Elm and I chose the performance velvet fabric in lagoon.  Absolutely gorgeous, I want one for my house, today please.

The Safavieh high back chairs aren't really my style, but I love the look of them in this scenario.  I think the high back is kind of reminiscent of a male peacock's beautiful and tall tail.

The surya rug reminds me of the shape of the individual tail feathers and I love the chartreuse so much.

There are lot of things in this room that individually aren't really my style, but I want this setup so bad now!  And this challenge was really fun, so I'm going to keep doing it, looking for inspiration in my everyday life as well as in other places.  Do you have any challenge ideas?  I'd love to hear them.

Tuesday, May 20, 2014

Fun Uses for Faux Wallpaper

I was looking on Etsy for affordable, removable wallpaper and I found a ton that I really love.  Seriously, I want to go and wallpaper the heck out of everything now!  Here are some of my favorites; you can see the rest here.


sources // 1 / 2 / 3 / 4 / 5 / 6

Aren't these so great?!  And I love that you can do just about anything with them. *click on images for sources*

http://home-2-me.com/2013/04/20/madebygirl-my-nyc-closet-line-insides-of-drawers-with-wallpaper/

I'm not big on animal print, but I love how it really elevates the look of this drawer.  Such a fun way to add pattern without it being too bold or overbearing.

http://www.apartmenttherapy.com/alternative-art-51644

Framed wallpaper can be a great way to incorporate very inexpensive art into your home.  You can buy sample sheets that are 12"x24" from Spoonflower for only $5 and the selection they have is huge.

http://arquitetura-pessoal.tumblr.com/post/22651982059#.U3ts9y9_NTQ

Wallpapering the inside of your closet is another great way to add a big punch of pattern and color in a small way.  I think it would be so fun to put it into a walk-in closet with a fun pendant lamp or even a mini chandelier, and a pretty floor length mirror.  You could make your closet the funnest room in the house!  Wouldn't that make getting ready a lot more fun too?

http://paloma81.blogspot.com/2012/02/beautifully-organized-medicine-cabinet.html?utm_source=feedburner&utm_medium=feed&utm_campaign=Feed:+blogspot/ladolcevitablog+%28La+Dolce+Vita%29&utm_content=Google+Reader

I'm sure you've seen pictures all over Pinterest of kitchen cupboards lined with wallpaper, but I love the idea of lining the medicine cabinet!  It's so playful and unexpected.  This one is on my to-do list, you know, if we end up living in a place that has a medicine cabinet...

http://www.decorpad.com/photo.htm?photoId=107740&index=16&spaceId=2

I love the bright and bold colors in this bathroom and I think it's such a fun idea for a small space.  I'm a fan of big and bold pops of color being used in small spaces, if you couldn't already tell.

http://6thstreetdesignschool.blogspot.com/search?updated-max=2014-05-09T04:00:00-07:00&max-results=5

I really like the idea of using wallpaper on an accent wall, instead of paint.  I think the grasscloth used behind the TV in this family room adds great texture to a wall that you wouldn't really expect to have any depth.

http://www.ashleycoledesign.com/2012/08/secrets-styling-bookcase/

This image was one of my earliest pins and even though I am really over the Chevron print, I love how the black and white make the bookshelf and the decor stand out.  I love big, graphic designs like this and black and white is one of my all-time favorite color combinations.

Faux wallpaper is such a fun way to incorporate color and pattern into parts of your home that you wouldn't think to add anything.  Plus it's great for renters and those who don't want to commit or deal with the hassle of wallpaper.  Have you used it before?  I'd love to see what you've done with it!  And if you have any favorite sources for faux wallpaper, share them in the comments.  I'd love to check them out.

Monday, April 21, 2014

DIY Tufted Headboard - It's Finished!

My husband has been so incredibly supportive and nice enough to help me with this project and together we cranked out our headboard over the weekend.  It's finally done!  And now I kind of feel like...what am I supposed to do now?  Except not really because I have a list of projects, but it really feels weird (in a great way!) to have this done.  I've been wanting to make one for years now and then we finally started it and now it's done.  Crazy!


In my last post, we left off with the legs just being finished and needing to be attached.  To start, I found some screws that were long enough to go all the way through the legs and about 3/4 of the way through the plywood.  Then I found a drill bit that was small enough to create the right size whole for the screws.  The way my father-in-law taught me to do this is to hold up the screw and the drill bit behind it.  If the center of the screw, not the grooves, just barely hides the drill bit, then the drill bit is the right size.  When I calculated the measurements for my legs, I made it so the legs would go up ten inches on the plywood.  I measured ten inches and marked it with a sharpie on both sides, then I triple checked to make sure they were in the same spot.  I then marked a line at 2 and 8 inches from the top of the legs so I knew where to drill my holes.  After the holes were drilled, I clamped the legs down in place and then used the drill to place the screws.  I used four on each leg.

On this leg, the top of the screw broke off, leaving the rest of it still inside the leg, but the leg was secured tightly, so I didn't bother trying to fix it.

After the legs were attached, it was time to add the foam.  Upholstery foam is really pricey, so I decided to use a mattress foam topper instead.  I found these on sale and I decided to get three of them because I wanted the headboard to be really thick and soft.  The foam measured 75" x 54" and our headboard is 80" x 42", so there was plenty of foam, but it needed to be cut to fit.  I did that by laying it down on top of the plywood and lining up the bottom and left side.  Then I cut off the extra at the top and laid it down on the other side to fill in that gap and cut off the extra at the bottom.  To attach the foam, I used this spray adhesive to help it stay in place better, which didn't actually work all that well, but I think I could have used a lot more than I did.  I was just concerned about running out, silly me!


I used the spray adhesive for each layer.  I also switched sides with the smaller piece to avoid the chance of it creating this weird gap after it was all put together.  So I started with the small piece on the right, then on the second layer it was on the left, and then back on the right for the top layer.


After the foam was on, I covered it with quilt batting that measured 90" x 108".  It comes folded in half the short way (so 45" x 108", with two layers), and I decided to just lay it on top of the foam with it folded in half.  The extra layer of batting would just add extra softness.  Pull the batting around and staple it in place.


Make sure it's secured down well without ripping it.  The batting will help to hold the foam in place while your headboard is upright.


After the batting is secured, it's time to start tufting.  I bought 4 yards for this project, but the lady gave me 4 1/2 because it had been cut weird previously.  It was nice to have that extra fabric because we were able to cover the back of the headboard as well.  We started by draping the fabric over the headboard and we made sure that it was straight and in the right place so that we had enough on the top and bottom to staple it down.  The fabric is only 54" wide and the headboard is 42" plus the 15/32" inch thick plywood, 4 1/2" thick foam, and the layer of batting, so we had to be sure we had enough to pull over and back on the top and bottom.

When you start tufting, start on the top row and in the middle.  It'll be much easier to make sure the fabric is gathering in the right places this way.


For the tufting we used a 12" upholstery needle and waxed cording.  The waxed cording was really great because it didn't slip and slide around, which made pulling the buttons tight really easy.  We cut the waxed cording to 12" long and used two strands for each button.  To tuft, we first pushed the needle through the back out to the front so that we could see where the button was going to be.  After making sure it was in the right spot, we pulled the needle all the way through, which left a hole in the fabric so that we could see where to put the needle through again.  Then, we tied the wax cording tight around the back of the button, threaded the needle and pushed it through the hole and out the back.


Once the needle was out the back, my husband would pull the cording all the way out and then I would push the button as deep into the foam as I wanted it to go.  While I held the button in place, my husband then stapled it down, in a zigzag to hold it extra tight, and then he hammered down the nails so everything was secured.


We worked our way out left and right and finished the top row.


At first, things were moving really slowly as we figured out the whole process and started to get the hang of it, but after about the second row, we started to move a lot faster.


While you're tufting, you'll want to make sure to help guide the fabric into a diamond fold, but the fabric will do most of that on it's own.


After you're done with the tufting, it's time to pull the fabric around and staple it in the back.  Make sure that as you do that, you pay attention to where the fabric falls on the button lines because it needs to be gathered and folded so that it looks clean and not bunchy along the edges.  Since we had attached wooden pieces on the back to straighten out the plywood, we decided to use the extra foam we had to cover it up so it won't scratch walls.  We just covered them with the foam and stapled them in place.  Then we used the leftover fabric we had and covered the back with it, stapling it in place.


And now our headboard is complete!


Because it's so tall, it leans a little bit, so we'll need to attach it the wall.  We can't right now because we live with my in-laws and our bed is up against the Murphy bed they installed in our room.  So for now, it leans a little bit, but it still looks great.  I'm so happy with how it turned out!  So what do you guys think?  Is this a project you think you'd like to tackle too?

And in case you're interested, our duvet and shams are West Elm that we got for 50% off in store, the gold diamond pillows are from fabric I designed and I made them using my tutorial, and the navy blue pillow I got at Target on clearance for way cheap, but for some reason online it's full price.

Tuesday, April 15, 2014

Abstract Art

I'm not an artist and I won't even pretend to be one.  I took art classes all throughout grade school and I couldn't ever get my drawings to look right.  I can't paint beautiful landscape settings or gorgeous portraits.  What I can do is blend colors together and let my emotions guide the brush.

Abstract art is something that I've been drawn to for as long as I can remember.  I'm a very visual person, but I also look for art that evokes some feeling of emotion, which I think most people do.  That's why when I painted this canvas, rather than focusing on making it really pretty and perfect, I let my emotions take control and it resulted in a piece of art that I love and am proud of, because it represents me and how I was feeling when I painted it.  I was able to transfer those emotions from myself to the canvas and, to be honest, they weren't the best feelings, so when I was done, I actually felt a lot better.  Maybe I need more painting in my life?

I found this canvas with an old painting on it at our local antique shop.  It measures 38x22 and I loved it for it's size.  The painting on it had a lot of damage to it and it was actually painted on some paper that was attached to the canvas and there was no signature or name of any kind, so we couldn't even contact the artist because none of us knew who it was made by.  It was ripping off all the way around and it was just in really terrible shape.  I bought it for $7, which I think I could have bought it for even less, but the guy was asking $10 and I'm terrible at haggling, so I still consider this a great deal.


See that damage?  I didn't get a picture of the painting, but it was even worse.  The canvas itself, however, even with the stains, was still in good enough condition to be painted over.


The canvas was pulling away from the wood frame, so I went all the around with a hot glue gun to secure it down.  Then I wiped down the canvas front and back and the frame with a damp cloth to remove any dust or other loose particles.  After it was clean and dry, I painted the entire thing white, including around the edges so that it would have a crisp look.  I used Delta Creative Ceramcoat in white to cover the canvas as well as in my actual painting.  The other colors I used were Metallic 14K Gold by Delta Creative, and Zinc, Navy Blue, and Warm White by Americana.


Here's the finished product.  I love that it's totally unique and custom made, but like I said, what I love most about it is that it reflects me and that I actually painted something I like! 

Friday, February 21, 2014

adding contrast with black

Adding black to your decor can be a great way to add contrast and interest without having to actually change a whole lot, especially since black goes with practically everything.  I'm a big fan of clean white walls, but recently I came upon this home tour and saw this gorgeous living room with dark walls. *click on image for source

http://www.stylemepretty.com/living/gallery/picture/1351895/

How gorgeous are those walls?!  I love the contrast with the curtains and the built-ins, so gorgeous.  And then the rug combines both the dark and the light to help it all come together in a cohesive way.  I am in love.  So I started searching for more dark wall inspiration.

http://www.cococozy.com/2013/07/panel-perfect-diy-living-room-before.html

I love wainscoting in white, but this charcoal gray is gorgeous.  It really makes a statement.

http://thecolorfulbee.com/color-roundup-using-black-in-interior-design/

I really love these Ikea frames and I have plans of using them for a gallery wall in a similar way like in this picture above, but I'm really loving the contrast between the black walls and the white frames.  It makes for a great focal point without being too busy and it doesn't take away from the rest of the room at all.  I'm a minimalist at heart and I just love the bold simplicity that this setup offers.

http://www.bungalowblueinteriors.com/home/tag/painted-bookshelves

Painting the inside of bookshelves is another great way to add interest to a room.  You could also use colored contact paper for the same look without it being permanent, allowing you to change the look whenever you want.  I think these shelves are gorgeous with their straight lines; I prefer there to not be too much in the way of fancy woodcarvings and embellishments.  The dark interior of these bookshelves really makes the colorful books standout on the shelves.  This look adds design to the room without the need for much more in decor, and I just love the idea of having books be the star of the room.

http://www.pinterest.com/pin/163818505168775461/

If you're wanting to add contrast but don't want to paint your walls a dark color, why not try painting the door?  I love this idea, again very minimal which I love, but it really packs a punch.

http://www.pinterest.com/pin/163818505168878839/

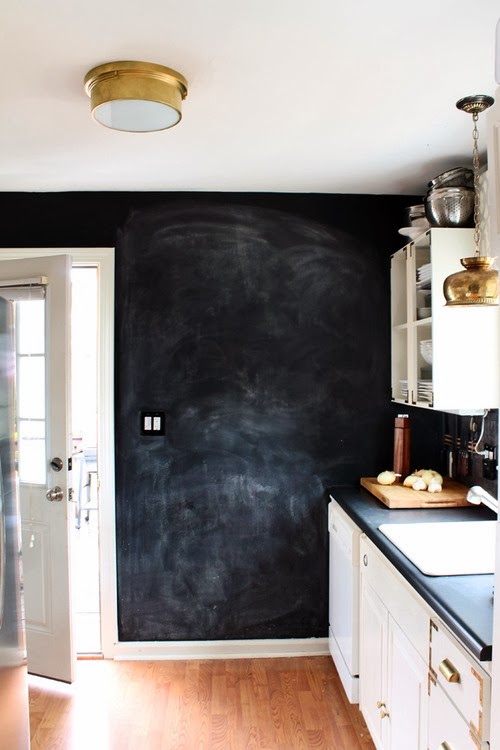
Chalkboard walls are nothing new, but I still think they are so fun.  If you're thinking of adding a dark colored wall, why not make it a chalkboard wall as well.  You can have a chalkboard wall in practically any color and it's multipurpose, providing a place for handmade artwork by you or your kids and you can use it for making lists or dinner menus.

http://www.pinterest.com/pin/163818505169165605/

I love this black and gold stair case.  It's so beautiful and elegant and really stands out against the white walls.  The black baseboards and trim around the doorway really help bring it all together.  If you're unsure about painting your stairs, check out Jenny Komenda over at Little Green Notebook.  She painted her stairs and I think it looks stunning.

http://domino.com/locally-grown

I love this black bathtub.  I don't know anything about painting a bathtub and I'm not really sure if it's something you would actually want to do, but if you're looking to remodel your bathroom or at least replace your bathtub, you could consider replacing it with one similar to this.  It's bold but beautiful and the white inside and the gold hardware really soften the black and add elegance.  I just think this whole bathroom is so beautiful.

So what do you think about adding black accents in your home?  Would you be brave enough to paint a whole room black or would you start out small?

Tuesday, October 8, 2013

Halloween Decor - Easy, Simple, & Inexpensive

We don't usually do a whole lot of decorating for Halloween, aside from carving pumpkins.  I thought it would be fun to do something, however minimal, to help it feel more festive around here.  I saw this ghost garland on Pinterest and thought it would be fun to make, but I did mine a little bit differently. 


Here's what you'll need.
  • white fabric
  • cotton balls
  • bakers twine, yarn, or string
  • black sharpie
I cut the fabric to approximately 10 inches by 5 inches; I didn't measure them because I wasn't looking for perfection, so I just eyeballed it.  Place the cotton ball in the center of the fabric and wrap it around so that it's pulled tight underneath the cotton ball.  Take your twine/yarn/string and tie it around to make a neck for your ghost.  Add two black dots for eyes.  Continue making the ghosts until you have your desired length, spacing them as close together as you like.

For the garland above it, I used these images for the bat, pumpkin and witch and put them into PDF files, which you can download here, here, and here.  Print them out onto construction paper and cut them out.  Then punch holes into them and thread your twine through.  Hang and enjoy!


I really like these, even though they are simple and kinda cheap looking, mainly because they didn't cost me anything to make and if my kids happen to grab them and destroy them, I won't be heartbroken over it.  They definitely help make our home feel more festive for the season and so far, the kids haven't touched them!  Although I'm not sure if I should take that as a good thing...